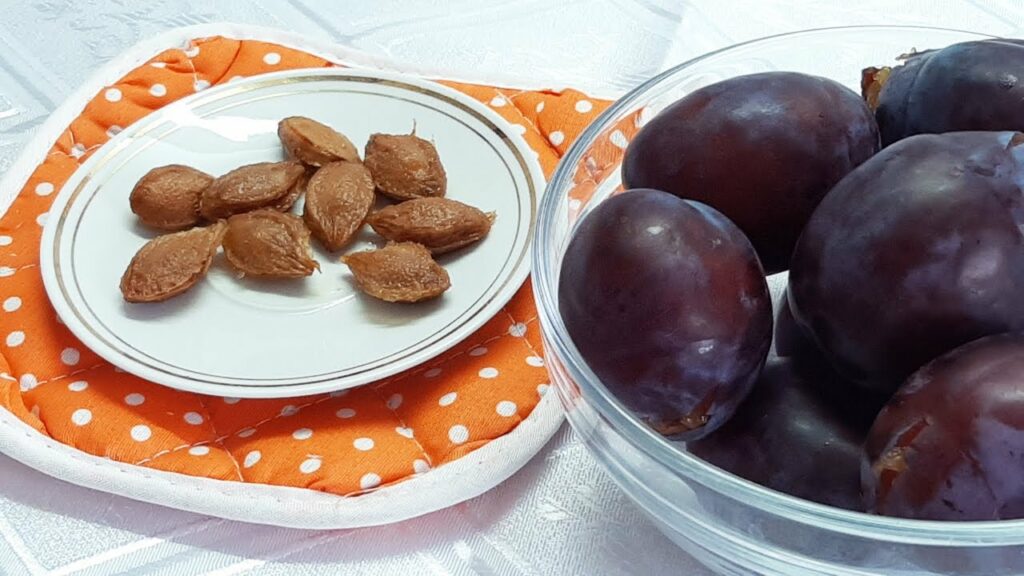
Plums are delicious, juicy fruits that can be enjoyed fresh, dried, or in various recipes. However, removing the seeds while keeping the plums whole can be a bit tricky. Whether you’re preparing them for cooking, preserving, or just snacking, this guide will help you master the technique. Here’s a step-by-step method to de-seed plums without damaging them.
Step-by-Step Guide to Removing Plum Seeds
What You’ll Need:
-
Fresh plums
-
A small, sharp paring knife
-
A cutting board
-
A small spoon or melon baller (optional)
Step 1: Select Ripe but Firm Plums
Choose plums that are ripe but still firm. Overripe plums are more likely to get damaged during the de-seeding process.
Step 2: Prepare Your Workspace
Wash the plums thoroughly under running water to remove any dirt or residues. Pat them dry with a clean towel. Set up your cutting board and ensure your knife is sharp to make precise cuts.
Step 3: Cut Around the Seed
Hold the plum vertically on the cutting board. Insert the knife into the plum at the top, near the stem, and make a careful incision around the circumference, following the natural seam of the plum. Be gentle to avoid cutting too deeply into the flesh.
Step 4: Twist and Separate
Once you’ve cut all the way around, hold the plum with both hands and gently twist the two halves in opposite directions. This should separate the halves and expose the seed.
Step 5: Remove the Seed
Use your fingers, a small spoon, or a melon baller to gently loosen and remove the seed from the flesh. If the seed is stubborn, carefully slide the knife under it and lift it out, ensuring you don’t damage the plum’s shape.
Step 6: Reassemble the Plum
If you want to keep the plum looking whole, press the two halves back together gently. The natural stickiness of the fruit should help them hold their shape.
Tips for Best Results
-
Choose the Right Plums: Freestone varieties are easier to de-seed compared to clingstone varieties, as the seed separates more easily from the flesh.
-
Work Carefully: Take your time to avoid cutting too deeply or damaging the fruit.
-
Use for Various Recipes: Whole, de-seeded plums are perfect for poaching, baking, preserving, or simply enjoying as a fresh snack.
Conclusion
Removing the seeds from plums while keeping them whole may seem challenging, but with a bit of practice and the right technique, it’s quite manageable. By following these simple steps, you can enjoy the full, juicy flavor of plums without the hassle of seeds. Whether you’re preparing them for a recipe or just want a neat snack, this method ensures your plums stay intact and delicious.
Enjoy your seed-free plums and happy cooking!