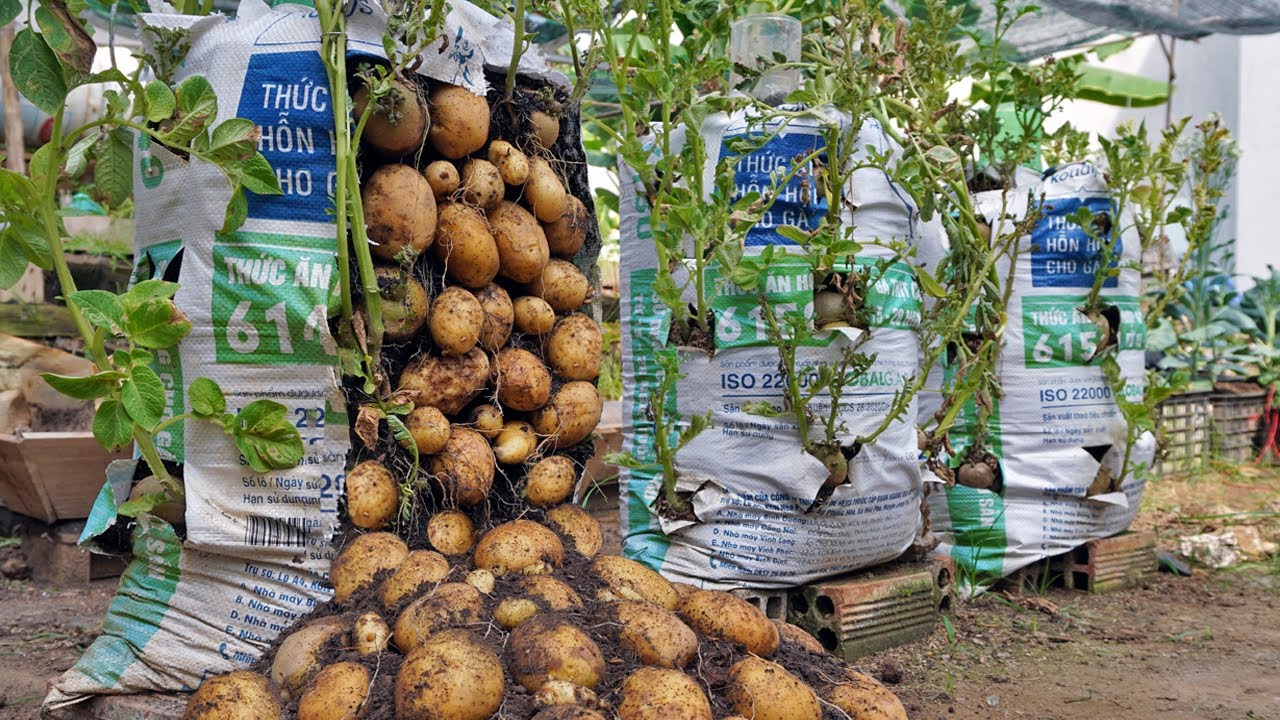

Growing potatoes in a container is a practical and rewarding way to enjoy fresh potatoes, even if you don’t have a lot of garden space. Here’s a step-by-step guide on how to grow a substantial amount of potatoes in a container:
Materials Needed
-
A large container (at least 30 gallons)
-
High-quality potting soil
-
Compost or well-rotted manure
-
Seed potatoes
-
Water
-
Fertilizer (low in nitrogen, high in phosphorus and potassium)
Step 1: Choose the Right Container
Select a large container that can hold at least 30 gallons. Make sure it has adequate drainage holes at the bottom. If drainage is a concern, add a few inches of gravel or small stones to the bottom of the container before adding soil.
Step 2: Prepare Seed Potatoes
Purchase certified seed potatoes from a garden center or an online supplier. Avoid using grocery store potatoes as they may have been treated to inhibit sprouting. A few days before planting, cut larger seed potatoes into chunks ensuring each piece has at least one or two eyes (buds). Allow the cut pieces to dry and form a callus over the cuts, which helps prevent rotting.
Step 3: Soil Preparation
Fill the container with a mixture of potting soil and compost or well-rotted manure. The mix should be loose, well-draining, and rich in organic matter. Fill the container about one-third full.
Step 4: Planting
Place the seed potato pieces on top of the soil layer, with the eyes facing upward. Space them about 12 inches apart. Cover the seed potatoes with about 4 inches of soil. Water the soil just enough to moisten it without making it soggy.
Step 5: Care and Growth
As the potato plants grow and green shoots emerge, continue to add layers of soil mixture to cover the new growth, leaving only a few inches of the plants exposed. This technique is called “hilling” and helps to increase the area where the potatoes can develop. Repeat this process until the soil is near the top of the container.
Step 6: Watering and Fertilizing
Keep the soil moist but not waterlogged, as potatoes prefer consistent moisture especially once the tubers begin to form. Water the plants deeply, especially on hot days. Fertilize with a balanced fertilizer after planting and then switch to a phosphorus and potassium-rich fertilizer to encourage good tuber development.
Step 7: Monitoring
Watch out for signs of pests or diseases. Common potato pests include potato beetles, and common diseases include blight. Remove affected leaves and treat with appropriate organic pesticides if necessary.
Step 8: Harvesting
Potato plants are ready to harvest when the foliage begins to die back and yellow. At this point, stop watering to allow the soil to dry a bit and the skins of the potatoes to harden. After a few days to two weeks, you can begin harvesting by carefully digging through the soil with your hands or a small tool to remove the potatoes.