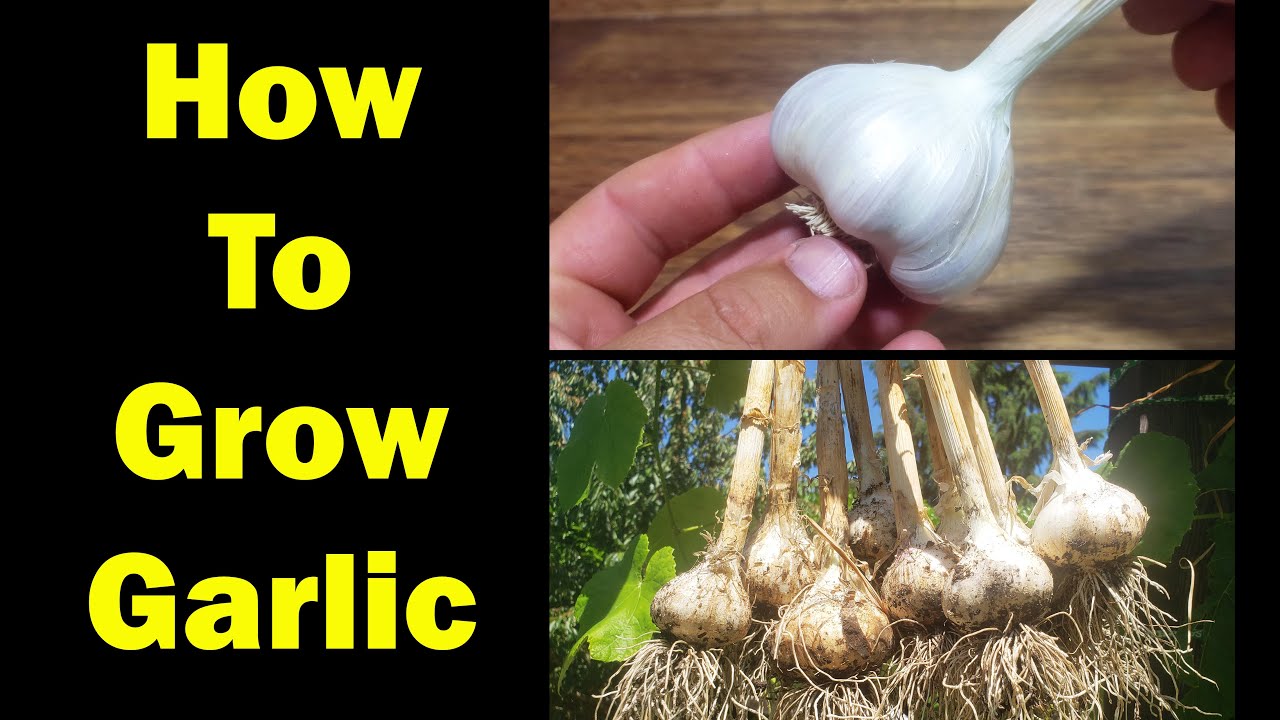

Growing garlic is a rewarding and straightforward gardening project, perfect for beginners. With a little patience and care, you can enjoy fresh, home-grown garlic right from your garden. Here’s the definitive guide to get you started.
Step 1: Choose Your Garlic
Start by selecting high-quality garlic bulbs from a local nursery or a reputable online source. While you can plant garlic from the grocery store, it may not be as reliable due to potential treatments to prevent sprouting.
Step 2: Prepare Your Planting Site
1. Select a Sunny Spot Garlic thrives in full sun, so choose a location in your garden that receives at least 6-8 hours of direct sunlight daily.
2. Prepare the Soil Garlic prefers well-draining soil rich in organic matter. Work compost or well-rotted manure into the soil to improve its fertility and structure.
Step 3: Planting the Garlic
1. Separate the Cloves Carefully separate the cloves from the garlic bulb, keeping the papery skin intact. Choose the largest cloves for planting, as they will produce the healthiest plants.
2. Planting Depth and Spacing Plant the cloves pointed end up, about 2 inches deep and 6 inches apart. Space rows about 12 inches apart to allow for adequate air circulation.
3. Mulch Apply a layer of mulch, such as straw or leaves, over the planting area. Mulch helps retain moisture, suppress weeds, and protect the cloves from temperature fluctuations.
Step 4: Watering and Care
1. Watering Keep the soil consistently moist but not waterlogged. Garlic needs regular watering, especially during dry periods, but be careful to avoid overwatering.
2. Weeding Keep the planting area free of weeds, which can compete with the garlic for nutrients and water. Mulch helps reduce the need for frequent weeding.
3. Fertilizing Feed your garlic with a balanced fertilizer or compost tea during the growing season to support healthy growth.
Step 5: Harvesting and Storing
1. Harvest Time Garlic is ready to harvest when the lower leaves turn brown and start to die back, typically in late spring to early summer. Carefully lift the bulbs out of the soil with a garden fork.
2. Curing After harvesting, cure the garlic by laying the bulbs out in a single layer in a dry, well-ventilated area out of direct sunlight. Allow them to cure for 2-3 weeks until the skins are papery and the bulbs are fully dry.
3. Storing Once cured, trim the roots and cut the stalks to about an inch above the bulb. Store the garlic in a cool, dry place with good air circulation, such as a mesh bag or basket.
Growing garlic is a simple and satisfying project. With this guide, you’ll be well on your way to enjoying fresh, flavorful garlic from your own garden. Happy planting!