Making your own butter at home is not only satisfying, but it’s also healthier, cleaner, and more affordable than many store-bought versions filled with additives or excess salt. And yes — it really does take just one ingredient!
🥛 The Only Ingredient You Need:
- Heavy cream (also called whipping cream – 30% fat or more)
Optional additions: a pinch of sea salt for flavor, or herbs/garlic for savory versions
🧈 How to Make Homemade Butter (Step-by-Step):
🥣 Method 1 – With a Mixer or Blender:
- Pour cold heavy cream into a blender or stand mixer.
- Start whipping on medium-high speed.
- After about 5–10 minutes, the cream will go through stages:
- Whipped cream
- Thickened
- Then it will separate into yellow butter and liquid buttermilk
- Once fully separated, strain the buttermilk (save it for pancakes or baking!).
- Rinse the butter under cold water while kneading with a spoon or spatula to remove remaining buttermilk. This keeps it fresh longer.
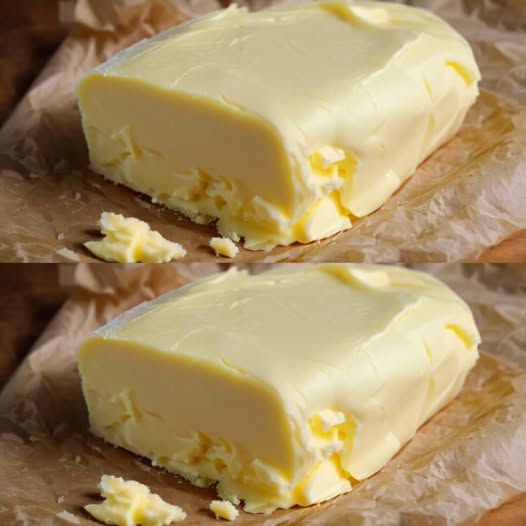
- Pat it dry, shape into a ball, and store in the fridge.
🥄 Method 2 – Shake It by Hand:
- Pour heavy cream into a clean glass jar, filling only halfway.
- Shake vigorously for 10–15 minutes (great arm workout!).
- When you hear sloshing, open the lid – you’ll see the same separation!
- Strain, rinse, and store as above.
✅ Why It’s Healthier:
- No preservatives or coloring
- You control the salt and added flavors
- Made fresh = no unnecessary processing
- Can be made from organic or grass-fed cream
🧈 Storage Tips:
- Store in an airtight container in the fridge for up to 1 week
- For longer storage, freeze in portions
🍞 How to Use:
- Spread on toast, muffins, or pancakes
- Melt on steamed vegetables
- Whip into mashed potatoes
- Use in cooking or baking just like regular butter
Final Thought
Homemade butter is a small joy with big flavor and health benefits. With just one ingredient and a few minutes, you’ll create something rich, creamy, and totally natural. Once you try it, you’ll wonder why you didn’t start making it sooner! 🧈💛