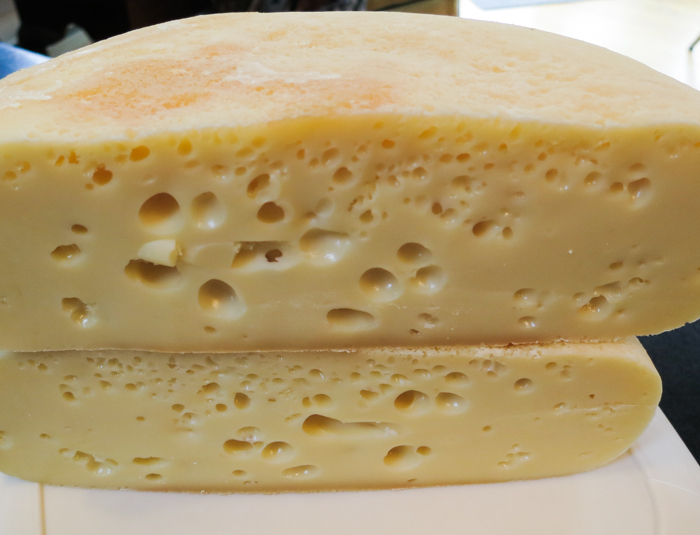

Swiss cheese, known for its distinctive holes and mild, nutty flavor, is a popular cheese variety that can be made at home with a few ingredients and some patience. The process of making Swiss cheese involves curdling milk, forming the curds, and then aging the cheese to develop its characteristic flavor and texture. Here’s a step-by-step guide on how to make Swiss cheese at home.
Ingredients and Supplies
-
2 gallons of whole milk (preferably raw or non-homogenized)
-
1/4 teaspoon mesophilic starter culture
-
1/8 teaspoon propionic shermanii culture (this culture produces the holes in Swiss cheese)
-
1/4 teaspoon liquid rennet (diluted in 1/4 cup of cool, non-chlorinated water)
-
2 teaspoons of cheese salt (non-iodized)
-
Cheesecloth
-
Cheese mold with follower (a press with 15-20 pounds of pressure is recommended)
-
Large pot (stainless steel or non-reactive)
-
Thermometer (to monitor the temperature of the milk)
-
Cheese press
-
Aging space (a cool, humid environment, ideally around 50-55°F with 85% humidity)
Step-by-Step Instructions
1. Prepare the Milk
-
Pour the 2 gallons of milk into the large pot and heat it slowly to 90°F (32°C). Stir the milk gently as it heats to ensure even warming.
2. Add the Cultures
-
Sprinkle the mesophilic starter culture and the propionic shermanii culture over the surface of the milk. Let the cultures sit for about 2 minutes to rehydrate, then stir them gently into the milk using an up-and-down motion.
-
Cover the pot and let the milk ripen for 30 minutes at 90°F. This allows the cultures to begin working in the milk.
3. Add the Rennet
-
After 30 minutes, add the diluted rennet to the milk. Stir gently for about 1 minute to distribute the rennet evenly throughout the milk.
-
Cover the pot again and let the milk sit undisturbed for 30-40 minutes, or until it sets into a firm curd. The curd should have a clean break when you insert a knife or spoon into it.
4. Cut the Curds
-
Once the curd has set, use a long knife to cut it into small, uniform cubes about 1/4 inch in size. Start by cutting vertical lines in one direction, then rotate the pot and cut perpendicular lines to form a grid pattern. Finally, cut horizontally to ensure even-sized curds.
5. Cook the Curds
-
Slowly heat the curds to 125°F (52°C) over 30-40 minutes, increasing the temperature gradually. Stir the curds gently during this process to prevent them from clumping together.
-
Once the curds reach 125°F, maintain this temperature for another 30 minutes while stirring occasionally. The curds will become firmer as they cook.
6. Drain the Whey
-
Line a colander with cheesecloth and place it over a large bowl to catch the whey. Pour the curds into the cheesecloth, allowing the whey to drain off.
-
Tie the corners of the cheesecloth together to form a bag and hang it up to drain for about 30 minutes. You can use a kitchen faucet or a hook for this purpose.
7. Salt the Curds
-
After the curds have drained, open the cheesecloth and sprinkle 2 teaspoons of cheese salt evenly over the curds. Mix the salt into the curds gently with your hands.
8. Press the Cheese
-
Transfer the salted curds into the cheese mold. Press the curds under 15-20 pounds of pressure for about 6 hours. You can start with lower pressure and gradually increase it.
-
After the initial pressing, remove the cheese from the mold, unwrap it, flip it over, and press it again for another 6 hours.
9. Dry the Cheese
-
Once the cheese has been pressed, remove it from the mold and unwrap it. Place the cheese on a cheese mat or clean surface and let it air-dry at room temperature for 2-3 days. Turn the cheese several times during this period to ensure even drying.
10. Age the Cheese
-
After drying, place the cheese in your aging space (a cool, humid environment) for aging. Swiss cheese typically ages for 3-4 weeks to develop its flavor and texture.
-
During the first week of aging, maintain the temperature at around 50-55°F (10-13°C) and the humidity at about 85%. Turn the cheese daily to encourage even aging and the development of the characteristic holes.
-
After the first week, increase the temperature to 65°F (18°C) for 2-3 weeks. This encourages the propionic bacteria to produce the carbon dioxide that forms the holes.
-
After the holes have formed, return the cheese to a cooler environment (50-55°F) to finish aging for another 2-3 weeks.
Enjoying Your Homemade Swiss Cheese
Once the aging process is complete, your Swiss cheese is ready to be enjoyed! Slice it up for sandwiches, melt it on a hot dish, or simply savor it on its own. Homemade Swiss cheese offers a delightful balance of nutty, sweet, and slightly tangy flavors, with the signature holes that make it so distinctive.
Making Swiss cheese at home requires patience and attention to detail, but the result is well worth the effort. Enjoy your delicious, homemade Swiss cheese!