The No-Oven Pan Bread Miracle
This no-oven pan bread is a “treasure” for anyone who wants fresh, warm bread without the “stress” of a complicated kitchen. This recipe is a “secret” because it uses the direct heat of a frying pan to create a “crispy” outside and a “cloud-like” inside in just minutes. It is a “smart” and economical way to save money and avoid the “preservatives” found in store-bought loaves.
This method is “incredibly good” because the bread stays “soft” for days and can be used for everything from breakfast toast to dinner dipping. It works by using a “high-moisture” dough that steams itself inside the pan, ensuring it never dries out. Once you taste this “golden” bread, you will truly feel like you won’t buy bread anymore.
Why Pan Bread is a Kitchen Treasure
- No Oven Needed: You can make this on a “camping trip,” in a small apartment, or even during a power outage.
- Lightning Fast: There is no “long wait” for rising like traditional bread; it is ready to eat in about 15 to 20 minutes.
- Budget Friendly: It uses the most “basic” pantry items that cost only pennies per loaf.
- Super Soft Texture: The pan “traps” the moisture, making the bread much “fluffier” than oven-baked versions.
- Zero Additives: You get the “pure” taste of flour and yeast without any hidden chemicals.
Recipe for the “Store-Ending” No-Oven Bread
This is the smartest way to get “artisan” quality bread using only a simple frying pan.
Ingredients:
- 2 cups of All-Purpose Flour
- 3/4 cup of Warm Water
- 1 teaspoon of Instant Yeast
- 1 teaspoon of Sugar (To “feed” the yeast)
- 1/2 teaspoon of Salt
- 1 tablespoon of Olive Oil (Plus a little extra for the pan)
Instructions:
- The Mix: In a bowl, combine the warm water, sugar, and yeast. Let it sit for 5 minutes until it looks “bubbly.”
- The Dough: Add the flour, salt, and olive oil. Stir until a “shaggy” dough forms, then knead it with your hands for 3 minutes until smooth.
- The Rest: Cover the bowl with a cloth and let the dough “relax” for 10 minutes in a warm spot.
- The Shape: Divide the dough into 4 or 6 small balls. Flatten each one with your hand until it is about the “thickness of a finger.”
- The Cook: Heat a non-stick pan over low-medium heat with a tiny drop of oil.
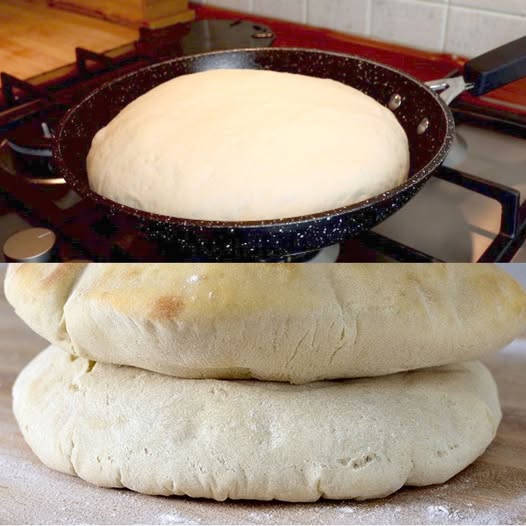
- The Rise: Place a dough circle in the pan and cover with a lid. This is the “secret” to making it fluffy!
- The Flip: Cook for 3 to 4 minutes on the first side until “golden brown,” then flip and cook for another 3 minutes (uncovered).
- The Result: A perfectly “puffed” and warm bread that smells like a professional bakery.
Recipe for the “Garlic and Herb” Butter Brush
If you want your bread to be “unbelievably good,” brush this over it while it is still hot.
Ingredients:
- 2 tablespoons of Melted Butter
- 1 clove of Crushed Garlic
- A pinch of Dried Parsley
Instructions:
- The Blend: Mix the garlic and herbs into the warm butter.
- The Magic: Brush it over the bread the “moment” it comes out of the pan.
- The Result: The bread “soaks up” the garlic flavor, making it a “gourmet” side dish.
Three Tips for Success with Pan Bread
- Low Heat is Key: If the heat is too high, the outside will “burn” before the inside is cooked. Keep it “gentle” and slow.
- Use the Lid: The lid creates “steam,” which is the “miracle” ingredient that makes the bread rise and stay soft.
- The “Warm” Test: Always use lukewarm water. If the water is too hot, it will “kill” the yeast and your bread will be flat like a cracker.
A Friendly Tip for Success
You’ll know the “Pan Bread Secret” is working when your neighbors ask which “fancy bakery” you visited! It is the “smartest” way to keep your home smelling “heavenly” while saving your hard-earned money.