
Making homemade butter is a smart move that acts like a natural energy-spark and flavor-shield for your body. This “single-ingredient treasure” works so well because fresh heavy cream “attacks” the “heavy” additives found in store-bought tubs and “stops” the “stale” taste of industrial fats. It is an easy and 100% cheap way to “fix” a boring breakfast, “erase” the “dull” feeling of processed spreads, and “keep” your healthy fats pure, leaving your kitchen feeling productive and self-sufficient almost immediately.
Instead of spending money on expensive premium brands or settling for oil-based margarines, this traditional technique “commands” the fat molecules to bond. It works by separating the solid fats from the liquid buttermilk and “making” the “heavy” burden of hidden preservatives “go away.” Once you “try” this rich and velvety trick, you will be surprised at how “quickly” your toast transforms and why your baking stays perfect every day!
Why Homemade Butter is a Total-Body Treasure
- The Additive Eraser: Choosing your own cream “helps” eliminate emulsifiers and dyes, taking away the “fake” feeling of factory food and keeping your diet clean.
- The Energy Guard: High-quality butterfat “tells” your brain to stay fueled, helping to “stop” the “tired” feeling of a low-fat crash fast.
- The Vitamin Fix: Fresh butter “attacks” the “dull” look of skin by providing fat-soluble Vitamins A, D, and E, getting rid of dryness and making your complexion glow.
- The Digestion Spark: The leftover liquid is real buttermilk, which “gives” your gut a gentle boost, reducing the “tight” feeling of a slow digestive system.
- The Purity Lift: This process “soaks into” your lifestyle as a sustainable habit, giving you an instant boost in kitchen confidence.
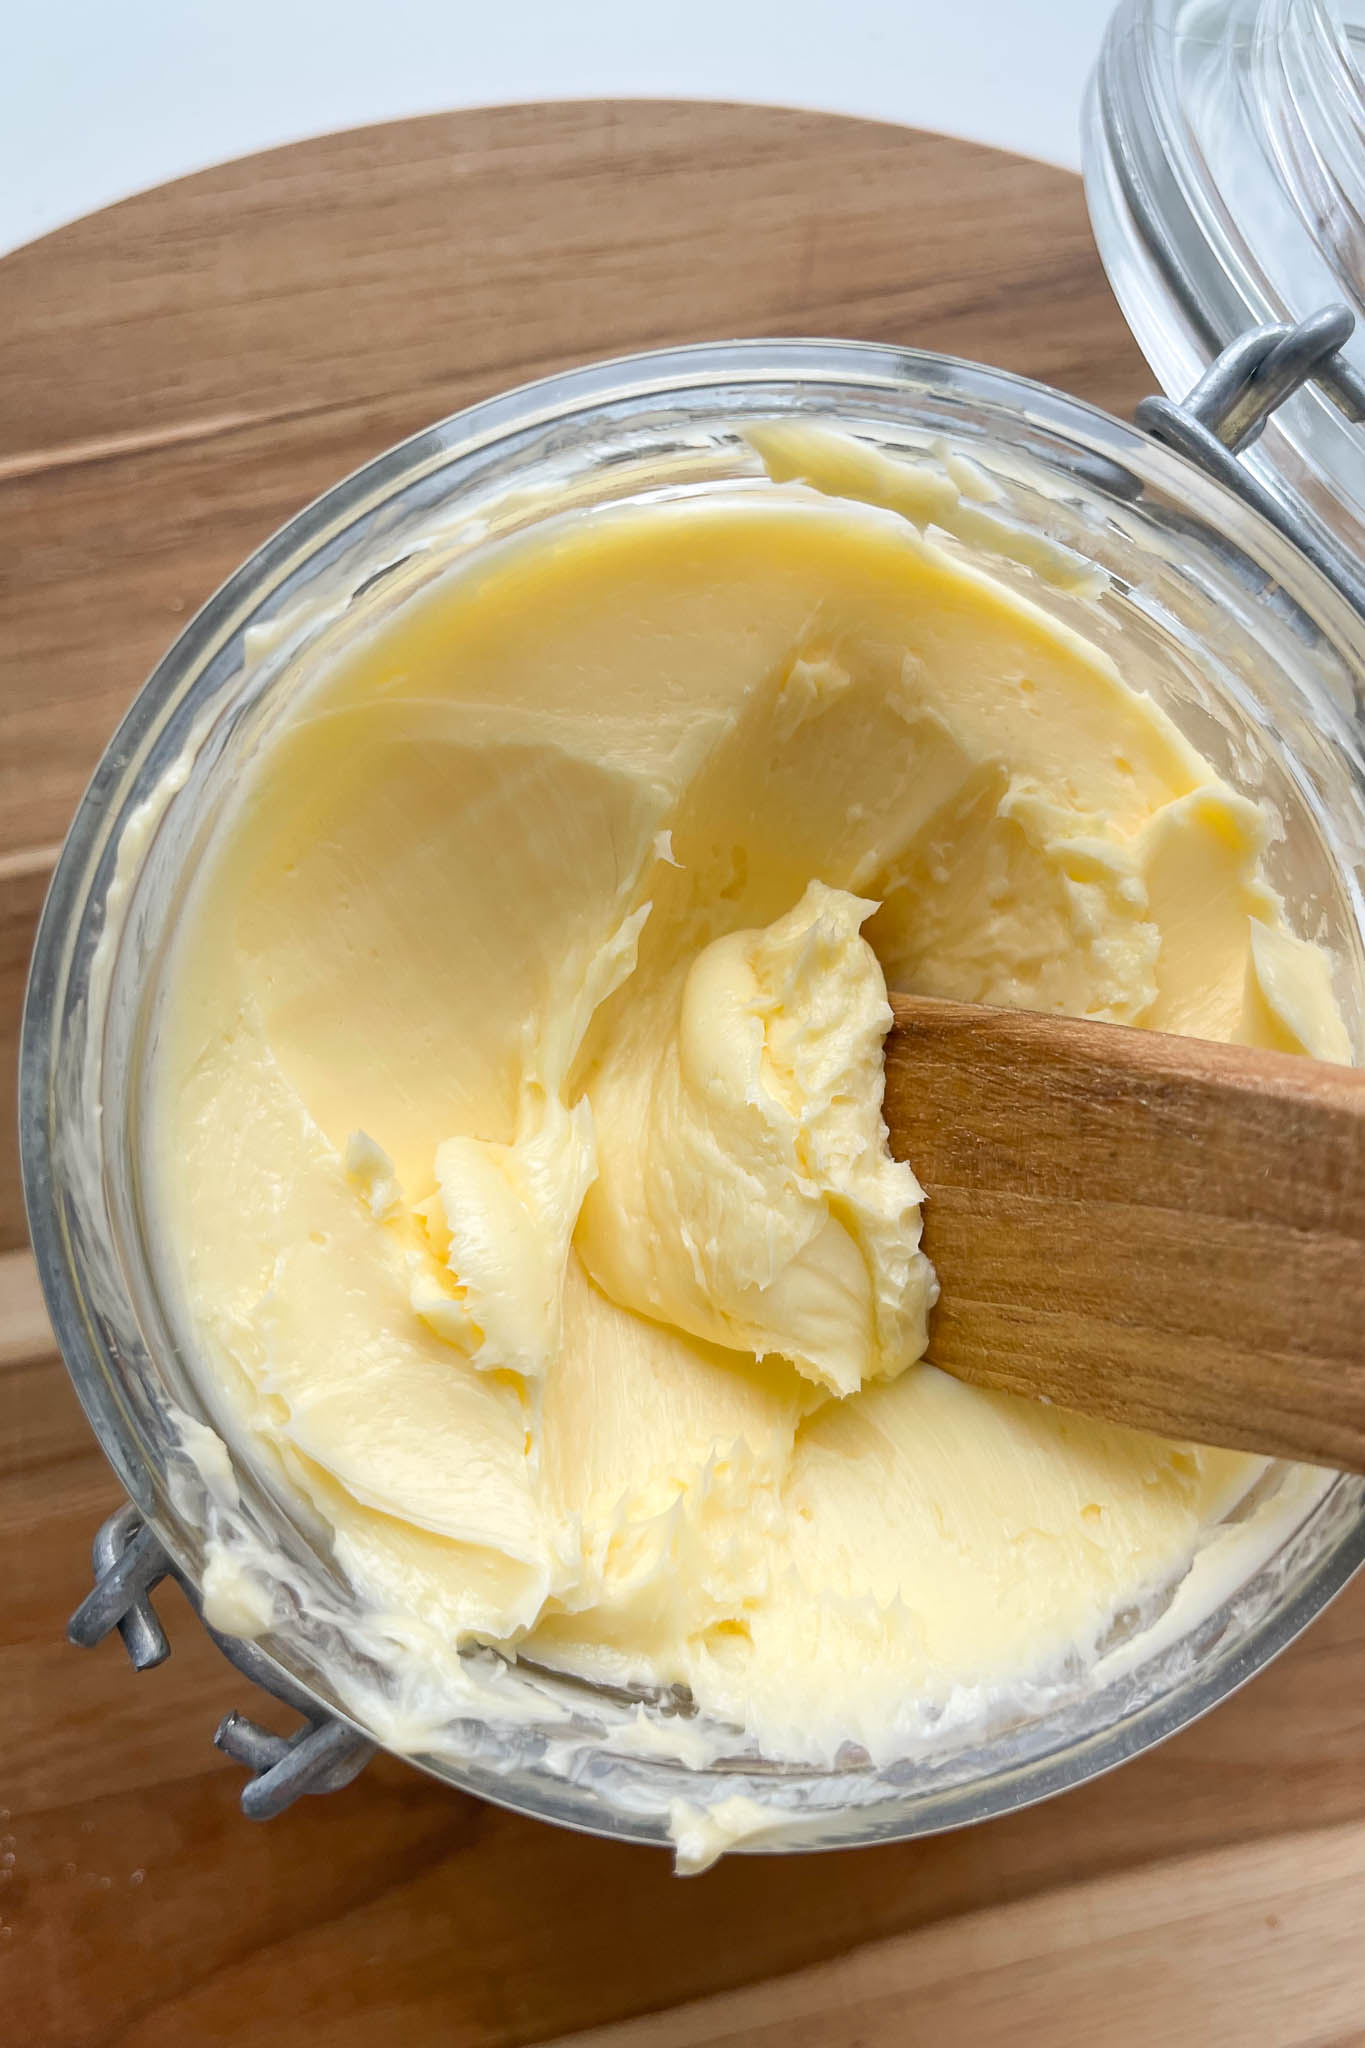
Recipe for the “One-Ingredient” Pure Butter
This is the best way to shake or blend the cream so the “fat globules” separate from the liquid “instantly.”
Ingredients:
- 2 cups of Heavy Whipping Cream (cold)
Instructions:
- The Pour: Pour the cold heavy cream into a large glass jar with a tight lid or a food processor.
- The Agitation: Shake the jar vigorously or turn on the processor. This “starts” the separation process “immediately” as the cream turns to thick foam.
- The Break: Keep going past the whipped cream stage until the yellow butter clumps together and a thin liquid appears. This “tells” the fat to solidify “fast.”
- The Drain: Pour off the thin liquid (this is your buttermilk!). This “makes” the solid butter ready for the final step.
- The Rinse: Place the butter in a bowl of ice-cold water and knead it with a spoon to squeeze out any remaining milk. This “signals” the butter to stay fresh and prevents it from spoiling.
- The Result: An instant feeling of accomplishment and a clear increase in flavor richness as soon as you spread it on warm bread.
Three Tips for Professional Results
- The “Cold-Water” Rule: You must rinse the butter until the water runs clear! Any leftover milk “attacks” the shelf life of your butter, so choosing “a thorough rinse” helps you get the best results for freshness.
- The Salt Secret: If you like salted butter, add a pinch of sea salt during the final kneading step. It “works” to ensure the “flavor” is “enhanced,” making your homemade spread tasty and savory.
- The Storage Habit: Keep your fresh butter in a sealed container in the fridge. Persistence “is” how you protect your spread from absorbing fridge odors, making your “dairy routine” feel easy and powerful.
A Simple Final Tip
You’ll know the One-Ingredient Secret is working when you realize your “sandwiches taste like they came from a French bakery” and your “family asks for your recipe!” It is the best way to save money using a simple treasure from the dairy aisle.